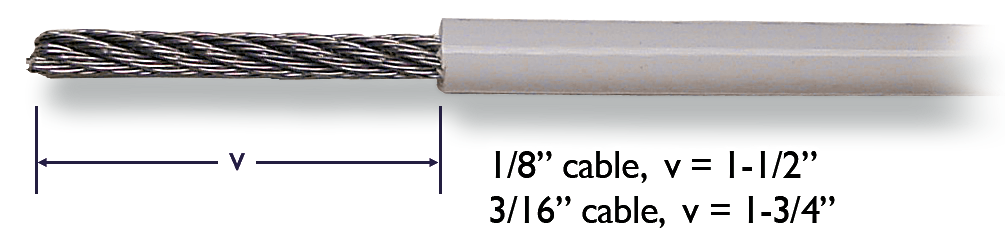
Make sure you have the proper equipment and all parts required. Use a sharp knife to strip vinyl cover (if required).
Step 2
If you are using vinyl coated cable it will be necessary to strip back the coating as shown above.
Step 3
Insert stripped cable into Handy Crimp fitting and crimp 3 times as shown in Fig #2. Install 3 crimps 1/8″ from end of fitting and 1/8″ apart, rotate 90 degrees for each crimp to ensure straightness of fitting.
Step 4
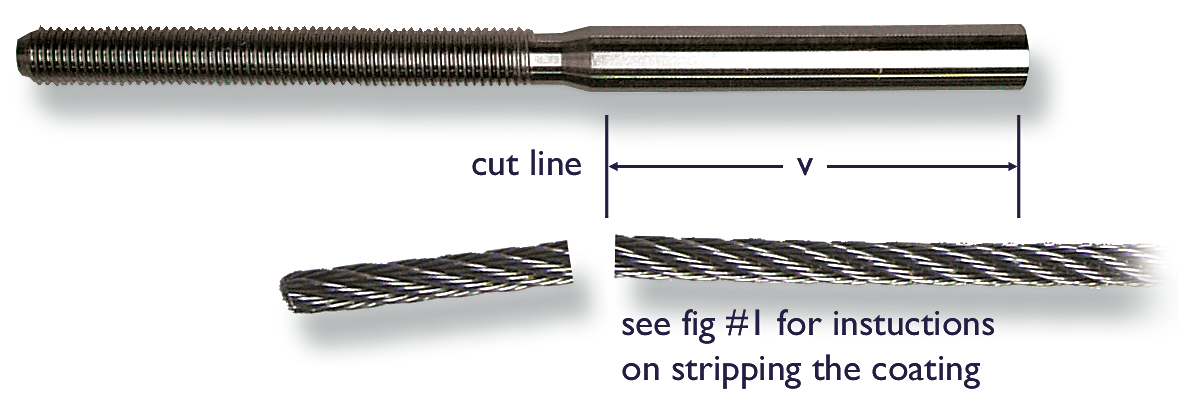
Attach un-crimped Handy Crimp fitting to other connection point and pull cable tightly along side. Measure for cut as shown above.
Step 5
Attach the crimped on end fitting to connection point. Run cable to other connection point. Ensure hardware is adjusted to 2/3rds open position.
Step 6
Repeat steps #2 and #3 for un-crimped end fitting.
Step 7
All crimps must be inspected utilizing a Micrometer or Caliper to the following specifications:

%20(1).png?width=575&name=Hayn%20Product%20Header%20(2240%20x%20660%20px)%20(1).png)